112 — How to create external bootable disk
reference → www.58bits.com
Objective:
Being able to simply plug the operating system of my choice into the USB port of a computer and boot whatever OS I want to.
Context:
We are using Unified Extensible Firmware Interface (UEFI) system partition (ESP).
The problem.
During most ‘normal’ OS installations - the OS being installed expects to either create, or find just one master boot record (MBR) or just one Unified Extensible Firmware Interface (UEFI) system partition (ESP).
If a UEFI ESP partition already exists, the installing OS will typically give you a choice to overwrite, or modify boot loaders in the ESP with the option of creating a ‘dual boot’ installation.
The problem with this process is that the new operating system - whether on an external drive or other, is now ‘bound’ to the computer’s main system partition and boot information. Not only is the external drive dependent on the boot information present in the host computer system partitions, but in most cases the computer won't boot if the external drive is removed. Not what we want!
Operations:
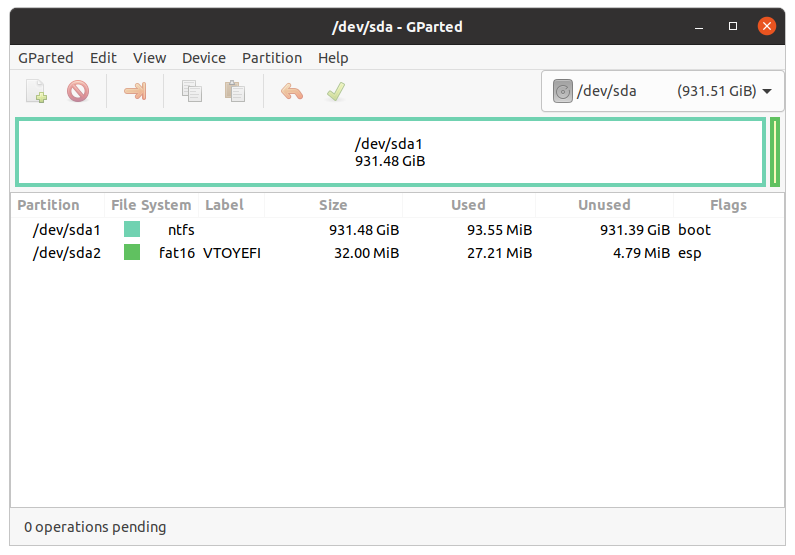
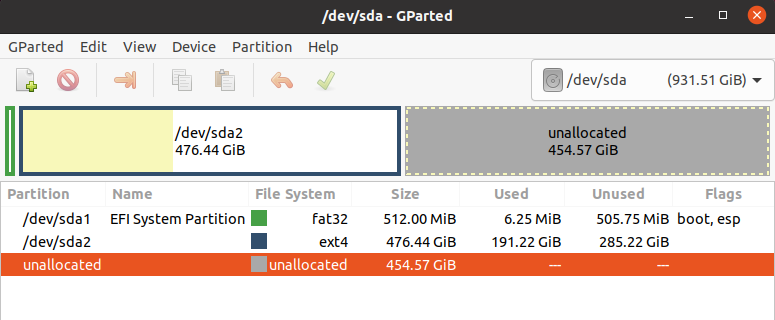
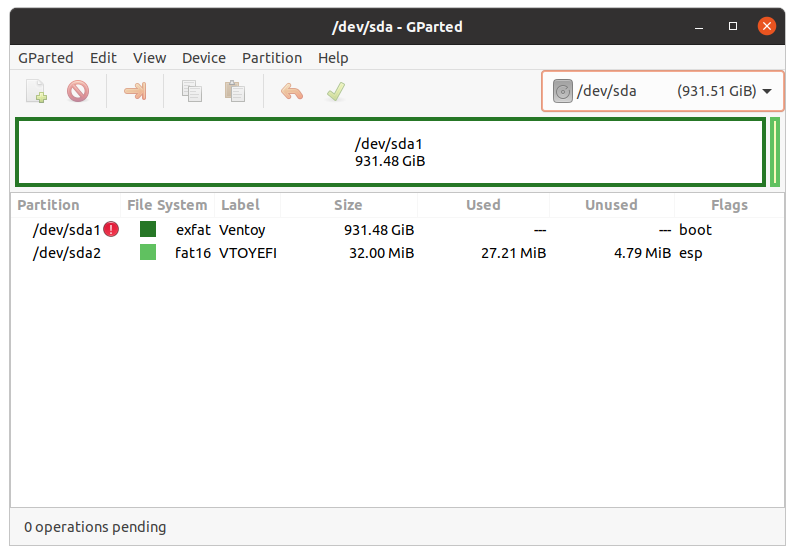
Check external Disk
- Using Gparted, select external drive. (upper right)
- /dev/sda1 is the boot partition EFI
- /dev/sda2 is the OS
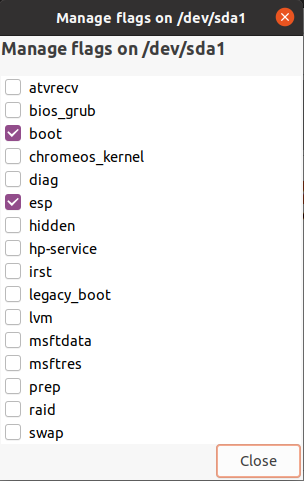
Once the partition has been created - right click on the newly created partition and select ‘Manage Flags’. Enable the boot and esp flags.
About /dev/sda1
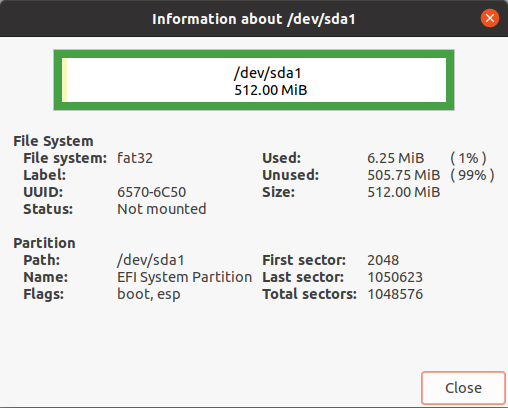
UUID: 6570-6C50 (uefi) UUID: 71e0fd40-16b4-4663-b4ae-f718f64304d0 (OS)
The remaining steps will show how to fix this, as well as how to correctly install a working GRUB bootloader onto our newly created /dev/sdb1 system fat32 ESP partition.
Install Grub onto the ESP partition
First, we need to correctly install the Grub bootloader onto the boot partition of our external portable drive - turning it into a truly portable installation.
Mount our new Ubuntu installation root volume from our external drive..
$ sudo mount /dev/sda2 /mnt
We now need to fixup the UUIDs of the mount points in fstab for our external Ubuntu installation using the UUIDs we made a note of earlier:
$ sudo vi /mnt/etc/fstab
This is /etc/fstab in the external drive.
img here
Copy and then comment the line with the /boot/efi mount point.
UUID=6570-6C50 /boot/efi vfat umask=0077 0 1
In your new line replace the current UUID with the one from above
- in this case "6570-6C50"
$ sudo mount /dev/sda1 /mnt/boot/efi
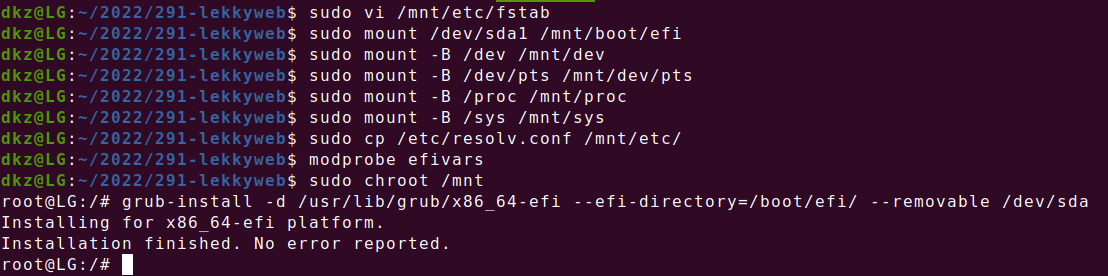
We now need to create some special system process mount points in our ‘simulated’ Ubuntu system, so that we can chroot into this volume and install Grub from the Ubuntu installation of our external drive itself (it must be installed using the same OS as the loader will target at boot).
sudo mount -B /dev /mnt/dev
sudo mount -B /dev/pts /mnt/dev/pts
sudo mount -B /proc /mnt/proc
sudo mount -B /sys /mnt/sys
Next we’ll copy over our current DNS settings just in case we need network access...
sudo cp /etc/resolv.conf /mnt/etc/
Next we load efivars. The modprobe efivars command loads the efivars kernel module, which gives the kernel access to EFI variables stored in NVRAM
modprobe efivars
Finally we’ll switch into a chroot environment in our simulated OS on the external hard drive…
sudo chroot /mnt
And now after all that, we're ready to install Grub. As with all of the instructions above, be sure to change /dev/sdb with your own external drive device identifier.
grub-install -d /usr/lib/grub/x86_64-efi --efi-directory=/boot/efi/ --removable /dev/sda
As Nicholas Dionysopoulos says in his excellent post
"When you have an external drive it is critical that you use the –removable option in the last step. This installs the EFI bootloader under the special “fallback path” EFI\Boot\bootx64.efi in the ESP. Normally this not supposed to be used for permanently installed Operating Systems. It’s the mechanism used by EFI BIOS to boot arbitrary external media. Technically, that’s exactly what our external hard drive is: arbitrary external media"
Your new external drive should now be bootable in any machine.
RECAP
Clean up the Dual Boot configuration
see → www.58bits.com
Ventoy
- download ventoy-1.0.77-linux.tar.gz and unzip.
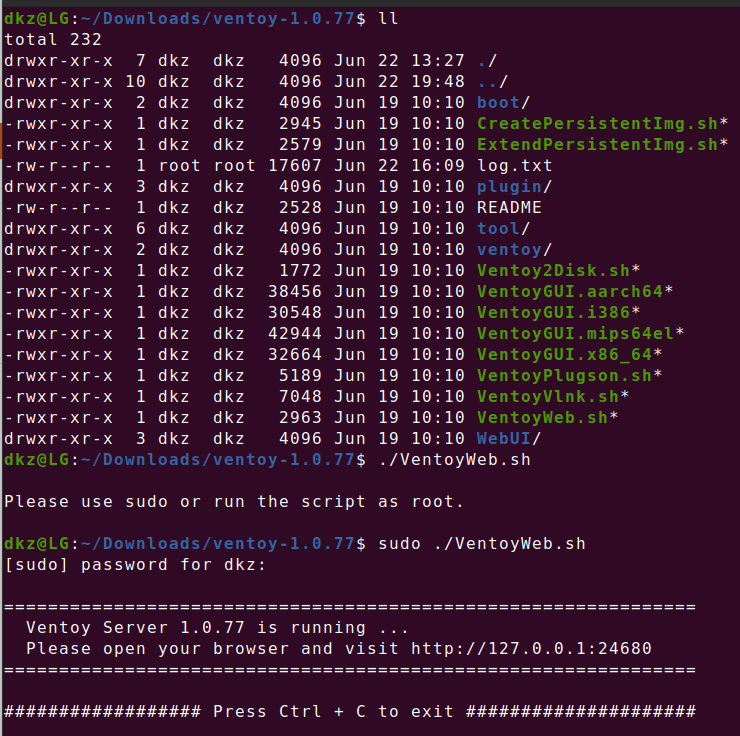
- Run the program
$ ./VentoyWeb.sh
=====================================
  Ventoy Server 1.0.77 is running ...
  Please open your browser and visit http://127.0.0.1:24680
=====================================

################## Press Ctrl + C to exit #####################
- Two partitions will be created:
- Reformat into NTFS (Not sure it's needed)